Introduction

My name is Mario Louka and I am a media student at the Latymer School. My candidate number is 9099 and I am working with Eddie Rowe (9147) and Ignacio Flores (9049) collectively in group 2.

In order to view my work please click on the 3 labels named 'A2 Research + Planning', 'A2 Construction' and 'A2 Evaluation'.ick above to enter the website

Above is our album cover.

My Music Video

Click below for our Music Video


Click above to enter the website

Monday 21 December 2015

Construction Post 6: Website post-production

To create our website, we used Wix which is a website creator/editor. The cloud based service allowed us to edit the site from anywhere which was particularly handy and the drag and drop nature of the website was very easy to pick up and use.

Our first decision was to decide which pages to put on the website. We mainly stuck to our flatplan here with a selection pages which were:

  • Home
  • News
  • Media
  • Store
  • Live
  • Bio
  • Contact
We felt these pages entailed the majority of things expected on an EDM artist's website and after receiving feedback from some of the audience, were happy to proceed with these pages.
The header of our website
After creating the basic website, we sat down with some of our media teachers and spoke about what we felt was missing. First of all, it was agreed that we didn't have enough interactive content so we thought up an idea of a tour announcement video by Orlando. We also found that some of our photos of merchandise in the shop were blurry so we removed or replaced them. Our layout was good but essentially, we just needed to bulk up most of the pages a bit. Below is the video we came up with.


To bulk up our pages, we really emphasised the synergy of all our online marketing campaigns. Therefore, we added links to soundcloud, instagram, iTunes and more. 

The instagram feed on the media page

The social media links at the bottom of each pages


After this, we then asked for some real audience feedback about our website. They generally liked the website, especially our addition of the instagram feed and a signing event.

The signing event
However, a lot of them felt that an entry page was something they often saw and that the addition of it may add to the professionalism of the website. Therefore, we made an entry page in response to the feedback. It was very simple and simply required us to add in a button and link it yet it had a real impact on the standards of our website.
The wix editing options
Our final touches simply involved finishing up the website with some final touches to add to the realism of our site. This was mainly checking that all of our links were working and simply adding contact information etc. to the contact page, which is something that our audience feedback noticed on our website as some of the links weren't working. 
The social links editing option
Overall, I'd say that Wix offered an easy to use yet efficient website creating service which certainly made the creation of our website a lot smoother than it may have been if we used a different service. The constant feedback was really important for us to keep moving forward and the ease of Wix made it easy for us to turn the feedback into final results which definitely impacted on the professionalism of our final website.

Construction Post 5: Digipak post-production

To create our digipak we used Adobe Photoshop. This was the most viable piece of software to use as it allowed us to import backgrounds, edit the photos and create an overall album using a multi-layer method helping to keep our work organised. After a thoroughly thought out photo shoot, we felt that the creation of the digipak would prove to be quite straightforward.

After thorough research prior to the creation of the digipak, we decided we wanted to follow the basic conventions of EDM and create an album cover with a focal image of Orlando and little else, similar to Martin Garrix's album below.
Our first decision was which photo we were going to use on the front cover of album. After a successful photo shoot, we had a variety of photos to choose from but essentially, it came down to if we wanted just a headshot or a full body shot of Orlando. After very vaguely overlaying both photos over a sample background and some basic text which we made using the text tool, we felt that the full body photo was better. We then asked some members of our target audience which they preferred to see if we had made the right decision and they agreed, so we opted to move forward with that photo.
A potential option for our front cover
Our final photo


Our second major decision was what our background would be. We were undecided whether to go for a plain background or or a more creative background. Once again, we input both into Photoshop to test them and the more creative background certainly looked more effective. With this in mind, we decided we wanted to input it onto all 4 panels of our digipak to keep continuity throughout but we didn't like the grey colour it came in. Therefore, we played about with the colour settings using the hue, saturation and lighting settings until we came to the blue that we liked.
Our background through all 4 panels

The colour settings


Our final main decision to make was the choice of text throughout the digipak. First of all, I created 2 alternate versions of our logo to give an option for what to use. I asked the group which one they preferred and we then asked some classmates for further opinion. We settled on one option because we felt it had more character than the other logo which simply looked a bit bland which is what our audience feedback also told us. We then tried using the same font as the logo for all the text on our digipak but we felt this didn't look effective and heard the same thing back when we asked classmates. Therefore, we searched for fonts using Dafont.com and settled on a font that we liked for all of the auxiliary text other than the logo. Photoshop made this easy for us too as after we had downloaded the font, we used a programme which enabled us to use the font on Photoshop.
The alternate version of the logo

The final version of the logo


Overall, I've really enjoyed using Photoshop to create our digipak. It was a really easy programme for this purpose and the multi-layer nature of the programme meant we could very easily experiment with different ideas and then put them back in a matter of seconds. The quick selection and refine edge tool was particularly useful for making sure our focal image didn't have any rough edges as it helped to smoothen them out which added a much more professional look to our finished product.
The multi-layers on Photoshop

Construction Post 4: Music Video post-production

Software
For the post-production of our music video, we used a variety of software to cut and create the finished product. We spent a large amount of time editing the video on Adobe Premiere and also used Adobe After Effects to create the majority of the backgrounds as well as animating some objects within the footage.

Adobe Premiere
Adobe Premiere served as our main bit of software for the actual editing together of the music video. Below is a screenshot of the interface.


We first layered the footage on alternate tracks to create a basic edit of the music video. Once we had received clearance from our teacher on the actual edit of the music video, work began on creating the backgrounds and objects on Adobe After Effects. Once the footage had been edited on After Effects, we imported it back into the Premiere project and put it on the track at the top. This simple organisation proved to be really useful as we could simply put in the newer shots whilst still leaving a complete timeline below of unedited footage.

We also added in some simple effects on after effects to add some variety to our music video such as this effect below created by cutting and reversing our footage and then playing it forwards again.

The real problem of using Premiere was the fact that we had to create a whole timeline and edit of our music video before we added in any effects. This meant that we had to visualise what our shots would look like after editing them before we had actually done it which proved to be problematic in sections. However, we simply stuck at the task and eventually got through it due to our persistence.

After Effects
After Effects was by far where the most amount of time and work was put in. It served as a huge task to create numerous backgrounds as well as objects within the shots. We also used it to grade our shots as we went along. Below is an example of the After Effects interface.

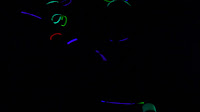
The footage was once again layered and we used different techniques to add in what we needed, for example, the glowing ball below was created by adding in a new layer which we cut into the shape of a ball. Numerous effects were then added, including a glow and the ball was given a motion path to follow. Although fairly simple sounding, each task proved to be very time consuming as a lot of experimentation of what would look best was undertaken at each level. We often got feedback from our peers about what looked best. In addition to this, we would ask a select group of our target audience about what they preferred and then make decisions based on this.

We also used After Effects to grade our footage. We used a package within the programme called Luma which was more advanced that what was possible on Adobe Premiere. We manipulated the contrast and saturation of every scene to create a look we were happy with. Below is an example of the end shot before and after editing and grading. 
Before grading
After Grading

We also changed the grade throughout the music video putting a darker grade prior to the entering of the dream and a much brighter grade after the dream had started helping to highlight the mood of the shots.

An overwhelming majority of our class mates preferred the footage after the grade with our whole class saying they preferred the footage after the grade when we conducted a survey.

As our whole music video was supposed to be as realistic as possible, we ensured we had multiple focus sessions with some EDM fans to see what they liked and what they suggested we could improve.

The main problem with After Effects was first the length of time it took to open, this could take up to half an hour which served as time we could've spent adding effects to the shots. In addition to this, due to the size of the shots after editing, our computer often lagged or simply couldn't play the shots in the editing window which meant we were somewhat editing blind, as we couldn't watch a complete music video unless we exported it. Finally, because our music video required a lot of experimentation, this served as a time constraint throughout with the constant issue of the deadline looming. In basic terms, this meant that we didn't have as much time as we liked to edit our footage of After Effects.


Construction Post 3: Production - photo shoots

The week following our capturing of footage for the music video, it was time to shoot some photos for our website and album cover. We allocated 3 days to capture the photos:

  • Wednesday 25th November - 13.45-15.45
  • Thursday 26th November - 16.30-20.30
  • Friday 27th November - 11.10-12.30
We felt that this would be enough to get our photos as we only had 1 artist to get photos of and then a few group shots of Orlando and the DJ together. In the end, we didn't need the Friday as we got all of our photos on Wednesday and Thursday.

Wednesday 25th November

This day went quite well, we took a lot of photos which meant a nice portion came out looking good. We made sure that we varied the poses I used and had an idea of what poses to use before-hand. We worked very efficiently resulting in a finish time to schedule. The only issue we really had was the lighting at the start of the shoot which we quickly sorted out. Below is an example of the overly lit shots and then some of the better shots. 

A better shot lit correctly
Too much light in this shot


Thursday 26th November

The 26th was a far more stressful day than the previous one. Although in the end we achieved the shots we needed, there was an issue with the flash which took a while to resolve. In the end, it meant the shots didn't come out as bright as we hoped for but it still worked out fine. The evidence of the flash showed up on the backgrounds as seen on the left when the flash was working and on the right when the flash wasn't, however, the background was getting edited out anyway so this was pretty irrelevant other than taking up a lot of time on the Thursday. 

We also used this day to get some group shots of myself and Eddie to use on the website. We focused on getting some serious shots and some fun shots too. These photos came out really well with a distinct variety. 
A fun shot
A serious shot


In addition to the group shots, we also took a few photos of Eddie by himself just in case we needed them for anything, this took a very short amount of time so although we didn't use them, it was worth being prepared. 
A photo of Eddie
Although we were obviously set back by the technical faults of the flash, we pulled together and still managed to finish on time which was really positive. After reviewing our photos on Friday morning, we concluded that we didn't need to shoot on Friday which wasn't really a surprise as we only had mainly 1 person to take photos of as opposed to the other groups which had 4. 

Construction Post 2: Production - video part 2

For Days 4-6, our priorities changed a little as we focused mainly on shooting our group shots and performance shots. We had planned ahead with our actors for our shoot to be at the end of the week so the 19th November proved to be a very big day for us.

Day 4 - 18th November

We had planned to shoot all of the performance footage of myself on this day as Shayam had other commitments for most of the day meaning we couldn't really use her. The day was quite successful as all we had to do was record me singing pretty much. Due to the fact that we were using both the school's 5D and Eddie's 600D Cameras, this meant that we recorded both angles of the singing at the same time which was far more efficient than if we had to record from one angle and then re-record from a different angle.
Eddie's Camera
School's Camera


Overall, our footage on the day was pretty good and was very useful for the edit as we could slide it in wherever we had a gap. We finished the shoot on time and had more time to prepare for the big shoot the following day.

Day 5 - 19th November

The 19th November was the biggest shoot for our group. 2 whole scenes relied on this shoot so it was vital that everything went smoothly. We started with the glow in the dark scene and shot this through lunch. Although lots of preparation had gone into this to make sure the glowsticks showed on camera, we made quite a large error as we thought our new UV paint was working on camera when we tested it but it was in fact only showing up from a very close distance which meant it was unusable. However, we still had the glowsticks which meant we could still create a variety of usable footage. Below is an example of some of the footage.
During our media lesson, we shot the footage from the new year's scene using people from our class and one of my friends who had a free lesson as we needed less people here. This was quite straightforward but we slightly overran here as we didn't allow enough time for multiple takes of each shot and we also wanted to add in some shots that we thought up on the spot as scene by the shots below. 
Finally, after school, we focused on shooting the Orange scene (daylight party). This part of the shoot went mainly to plan as we still managed to shoot all of the footage ahead of the time we had to leave. We did get what we needed but looking back at the footage now, I feel we could have done with possibly getting one more take of footage to use to vary the shots a bit. In addition to this, I feel a few more people on set would have looked better as the shots looked a bit empty in the wider angles.
A long shot of the Orange Scene

Day 6 - 20th November

The 20th November wasn't a shoot intensive day as we simply used it to re-shoot any missing or badly shot footage. We reviewed the footage in the morning and used lunch to re-shoot a few shots which we had made costume errors in. This only took about 20 minutes as there were no issues whilst shooting the footage. 
The footage after we corrected the costume error

Construction Post 1: Production - video part 1

We had 6 days in total to shoot our footage for the music video. Our priorities for days 1-3 were to shoot the majority of our individual shots as we had organised this with Shayam and our other actors with individual shots were me and Eddie. In addition to this, we wanted to get the artistic shots of the book, paper, headphones etc. as they didn't involve any extra people.

Day 1 - 15th November


Extract from the shoot-board for day 1
Our call time for the first day was 9am with a plan to begin shooting at 11am. We arrived particularly early to enable us to get into costume and make sure that we were completely ready to begin shooting at the desired time. As the group before us weren't using the Green Screen, we also had to start late to allow our technician to put up the Green Screen, a process which took a fair bit of time. With all of this in mind, we all made sure we arrived on time which led to a start time on schedule.


The first day of filming actually went really well as we managed to shoot what we needed ahead of schedule as a lot of the shots were quite simple, for example, shots of the book and headphones. Due to the fact that we managed to finish early, we went off schedule and trialed some shots using myself, Eddie and Shayam just so we had an excess of footage. We also added in a few extra shots of the objects so we had a variety of shots to choose from.

One thing that didn't go as well as we planned was the fact that Shayam was bare foot in these clips, something that we missed which led to a continuity error. This meant that we had to re-shoot all of the clips involving long shots of Shayam in order to fix this. 
The costume error 
Day 2 - 16th November

On the second day, we wanted to shoot the shots from the 'Mars' scene as again, we only needed Shayam for this. The shoot went really well as we shot all of the footage we needed apart from one shot which we forgot. Due to the nature of the shots we were recording, problems were rare and the time on this day was more than enough for what we were shooting.
Having said this, we did encounter an issue for the Flag Pole shot of how to shoot the stick, however, quick thinking meant we resolved this fast and achieved a good quality of footage by using a mop as a guide for where the flag would be. 

Day 3 - 17th November


Re-shoot
Costume error
The 17th was used mainly as a catch-up day to the footage we had already shot as we left the group shots for later in the week. Due to the fact that we only had a short day in the studio, until 5.15, we focused mainly on re-shooting the shots with the costume errors we made and also recorded the shot we forgot to do the day before as seen below.

R+P Post 33: Reflections on my role and contribution during Research and Planning

Researching the water guns we bought
So far, I'm really pleased with where our project is headed and based on the current work, I feel we are going to have a really successful end result.

I'm really pleased with my group because we all seem to be putting in equal amounts of work which means we're not having to make up for the shortcomings of one member. Therefore, it allows us to continue to be creative and efficient without having to worry about if the other members are up to date etc.

I have enjoyed going away and doing my own research and then bringing it back to the group and sharing during group meetings as I feel this is a really successful way at progressing. The fact that we have all been doing this means we all come back with fresh ideas ready to share for each meeting.

The planning process has also been very efficient as we've ensured as a group that we don't slack and fall behind. I created the costume and props lists so that we had a written indication of what we were having on each person for each scene rather than simply having it all in our head and running the risks of forgetting on the day.

Being the lead singer has meant I have an extra role too in having to learn the lyrics but this is something I did early on in order to not waste time later on in the course.

Overall, I'm really happy with where we're at and am looking forward to starting the production stage.

The costume list I created

R+P Post 32: Test shoot and rough edit

In the same way as our rehearsal week, we devised a shoot schedule to divide the studio between the 3 groups. Our group, in blue again, had 2 days where we were filming. Unfortunately, we had less time in the studio than both other groups and due to the heavy technical element of our music video, this proved to be an issue.

Due to the fact that other groups were in and out of the studio this week, it meant that we could only use a basic green screen which fit about 3 people on it. This was an issue as we couldn't space our characters out enough to film good long shots. We still managed to compile a range of footage and test a number of our shots but we couldn't create a complete rough edit as we simply didn't have enough time in the studio and technology let us down such as floor lamps blowing and the lighting rig getting stuck on a red setting. 

Above is an example of one of the opening shots. It gave us an opportunity to test the green screen, however, we didn't have time to edit in backgrounds as we were focused on preparing for the real shoot after putting the shot into the timeline. 

Points for Improvement

Make sure enough time is allocated to deal with any technical issues - This was clearly the biggest issue for us. In hindsight, there's not too much we could do about this as the shoot schedule was created around all 3 groups, not just ours but in future, we will make sure that we have enough time to deal with any technical issues. This is obviously often out of our hands as technology can fault at its own leisure but being prepared and organised will go a long way into creating a quick solution.

Try and fill out the scenes a bit more - The scenes look a bit empty, although a lot of this is down to how many people could fit on the small green screen, this is still something that we'll have to avoid for the real thing.

R+P Post 31: My call sheet

We created a call sheet in preparation for our real shoot. There weren't any special safety hazards other than hot lights and tripping hazards etc. but we still had talks with our cast about this, in particular students outside of media as they didn't have any experience of this. Overall though, it was simply good planning to create a call sheet which is what we aimed for throughout the whole course and it ensured that everyone had everyone's phone numbers in an emergency.
Our call sheet

R+P Post 30: My shoot-board

We have produced a shoot-board in preparation for our main shoot. A shoot-board is key and having produced this, I feel far more confident going into the real shoot as our organisation is sorted.


Benefits
  • The shoot-board helped our organisation as we only called actors in when we needed them and filmed shots in terms of who we needed rather than chronological order
  • We had a time schedule helping us to know whether we were on time and how far we should be
  • A description of the shot so we knew what we were filming without needing our storyboard
  • Acted as a multi-functional document collating other elements we've worked on e.g. scheduling and shots, into one document


R+P Post 29: Rehearsals

The rehearsal schedule
We've met with the other 2 groups to allocate time slots in the studio for our rehearsal week. This has been done based on when we're free and we've tried to allocate equal times for everyone.

Our groups slots were the blue ones meaning we had chunks on Monday, Wednesday and Friday. If there was an initial by the letter (I for Iggy, E for Eddie and M for Mario), this was when only that person could make the time slot. This was dictated by lessons. The even spread of our slots was useful as we could rehearse or get footage, review it and then make changes or try something else based on what we had seen.


We decided to test an initial idea we had for glow in the dark paint. To the left, the video shows our paint test which needed to be charged with light. Unfortunately, the paint didn't show on camera so we needed to rethink this idea.

We found this was a good opportunity to try some camera techniques also with our actress. As seen below, we're attempting to get the camera movement and opening of Shayam's eyes in sync as Eddie films and I direct.
We attempted to use the lighting rig to light our backdrop as we hadn't settled on the greenscreen idea yet. This proved problematic as we couldn't get our actors to stand out from the background, however, it was good that we were facing these issues now rather than in the real shoot. 

Overall, I would say that the rehearsals were really useful as it gave us an opportunity to experiment and try out some of our techniques but still allowing enough time to change an idea if it didn't work e.g. the glow in the dark paint. 

R+P Post 28: My kit list

A photo of the studio without the greenscreen
Our whole shoot is going to be filmed in the studio as we are using the green screen for the majority of our music video and it offers an unrivalled use of lighting. This means we won't have to be carrying heavy kit outside of school grounds.

Our Kit List

The lectern
  • Canon 5D Mark II camera
  • Canon 600D camera
  • A variety of lenses (50mm, 24-105mm)
  • Green Screen Cyclorama
  • Floor lamps (ARRI lights)
  • Lighting Rig
  • Lighting Desk
  • Tripod
  • Dolly
  • Batteries
  • 2 SD cards
  • TV monitor
  • HDMI cable
  • Lectern With:
  • Macbook Pro
  • Studio sound system
  • Control tablet
Cameras

We will alternate on our use of camera's as we feel Eddie's 600D is more useful for taking close ups and the 5D is better at longer shots. In addition to this, we can film 1 clip from 2 different angles by using both of these cameras at the same time. 


Lighting

The lighting Desk
The ARRI lights
The lighting desk is going to be hugely useful. As we are using a green screen, we can set the lighting rig to bright white lights to achieve our desired lighting. We will also use the smaller ARRI floor lights to add any additional lighting if it is needed.